How to work with bazaar through the GUI on Windows
Alternative: use Bazaar from the command line
If the GUI is not your prefered way of doing things, please see How to work with bazaar on the command line
Download Bazaar for Windows
You find the downloads for Bazaar for Windows here: http://wiki.bazaar.canonical.com/WindowsDownloads
We currently recommend to use the Standalone 2.2 Stable Release. This includes the core Bazaar distribution and several GUIs for Bazaar.
We have noticed that the german translation is not complete at all, and on German Windows systems the GUI is quite mixed up with several languages. Solution: delete all but the en locale directory from C:\Program Files\Bazaar\locale.
See also Visual Tour of Bazaar Explorer on Windows.
Setup your environment
Start Bazaar Explorer from the Start menu.
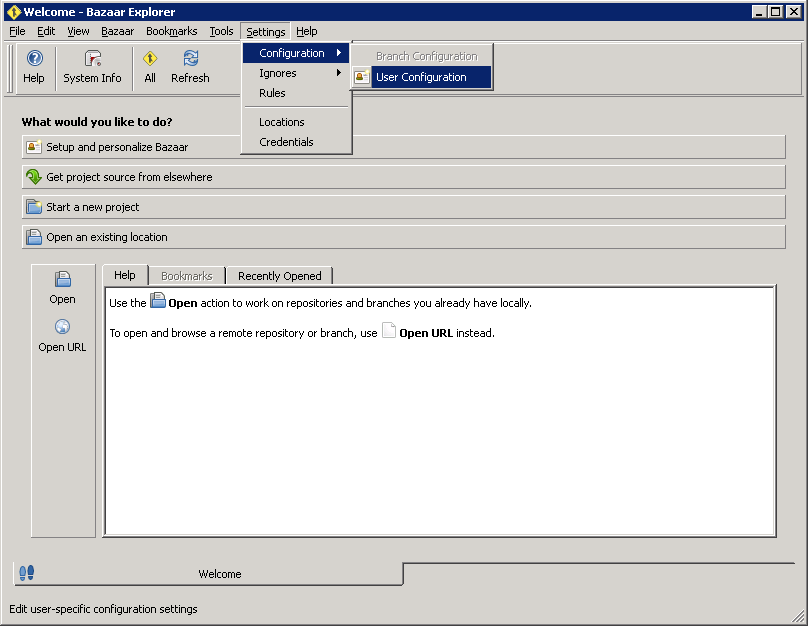
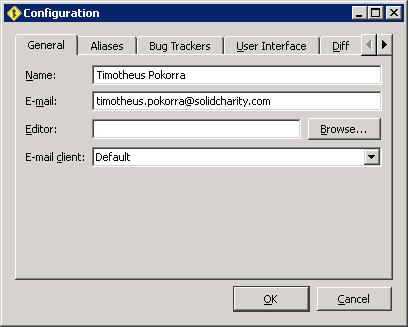
Go to Settings|Configuration|User Configuration to set your user name and email address:
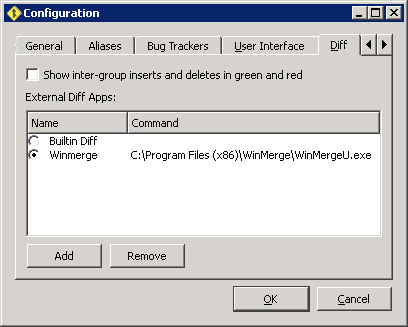
If you prefer to use WinMerge for showing the diff of files, you can configure it in the same window as well:
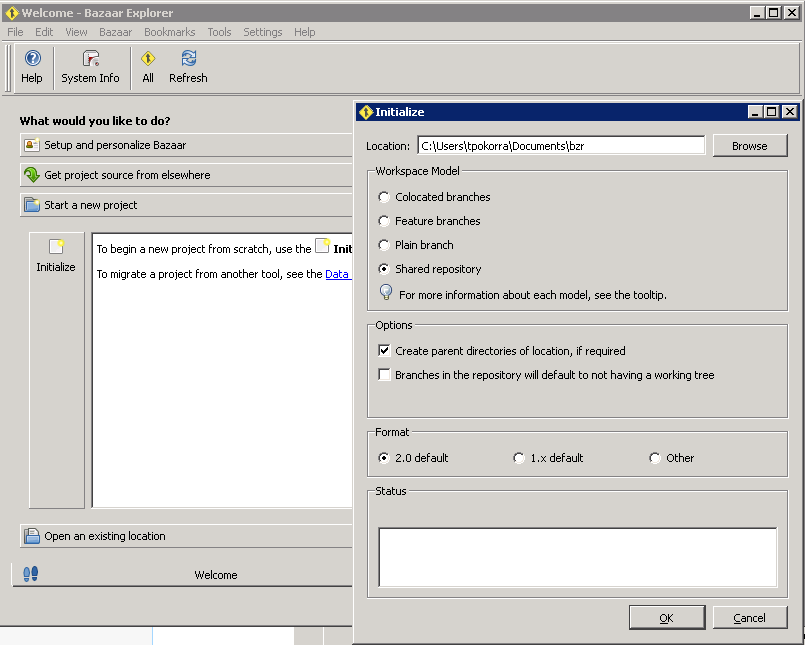
Now you should configure a directory where you will store all your branches. Go to "Start a new project", and click on "Initialize". Make sure to select the options "Shared repository" and "Branches in the repository will default to not having a working tree".
I have chosen the directory <My Documents>/openpetra/bzr/
You might be asked, if you want to create a new "hat". Just say yes. An explanation can be found here: http://wiki.bazaar.canonical.com/BzrExplorer#hats
Get the files
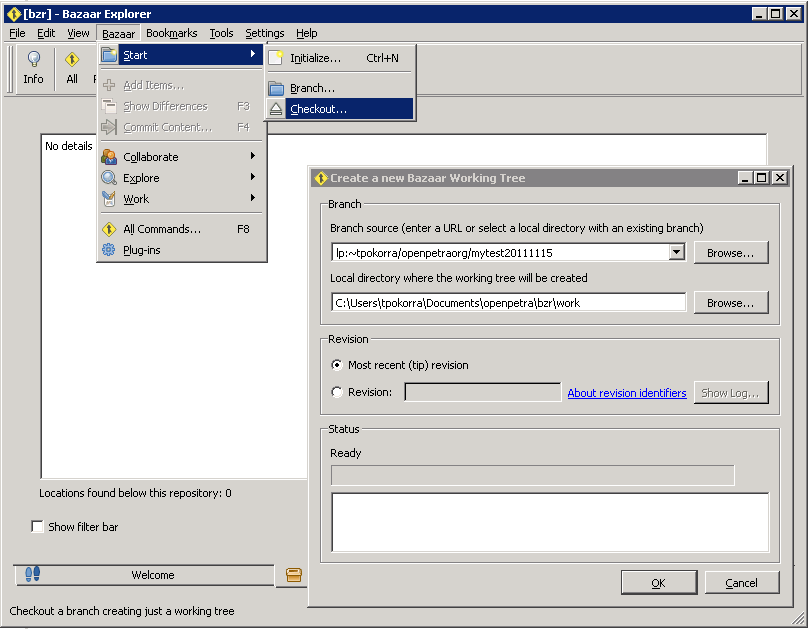
You can now download the trunk into your own directory, by selecting in the menu Bazaar | Start | Checkout.
As a developer with ssh permissions for the repository, use this source URL:
bzr+ssh://bazaar@bzr.openpetra.org:2208/openpetra/trunk
Important for developers with ssh permissions: make sure you have started pageant with your private key, otherwise your connection to the bazaar server will fail.
For anonymous access, use
http://bzr.openpetra.org:8008/openpetra/trunk
The destination for the checked out trunk would be in my case:
<My Documents>/openpetra/bzr/trunk
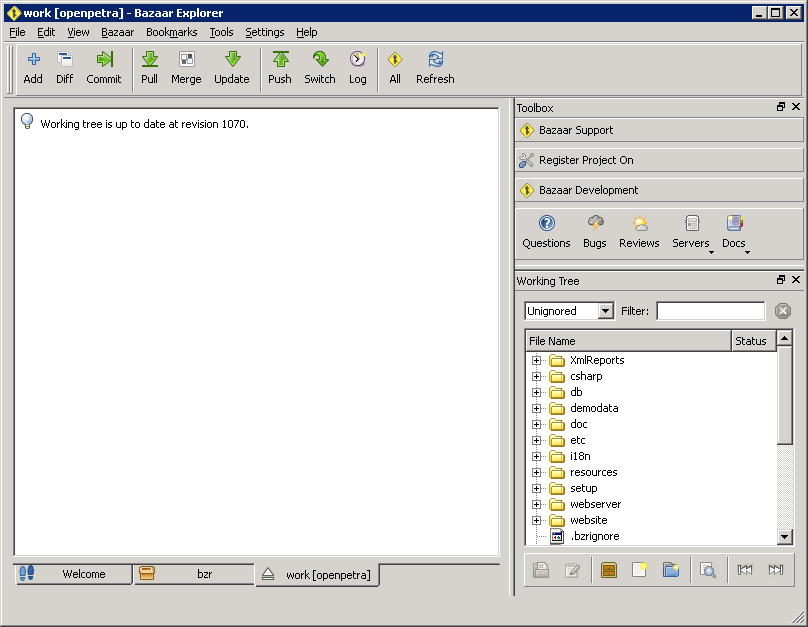
After the checkout has finished, click on Refresh in the Bazaar Explorer, and then double-click trunk to get to this screen:
This screen gives you access to operations like:
- Add: add new files
- Rename: rename files in the working tree control
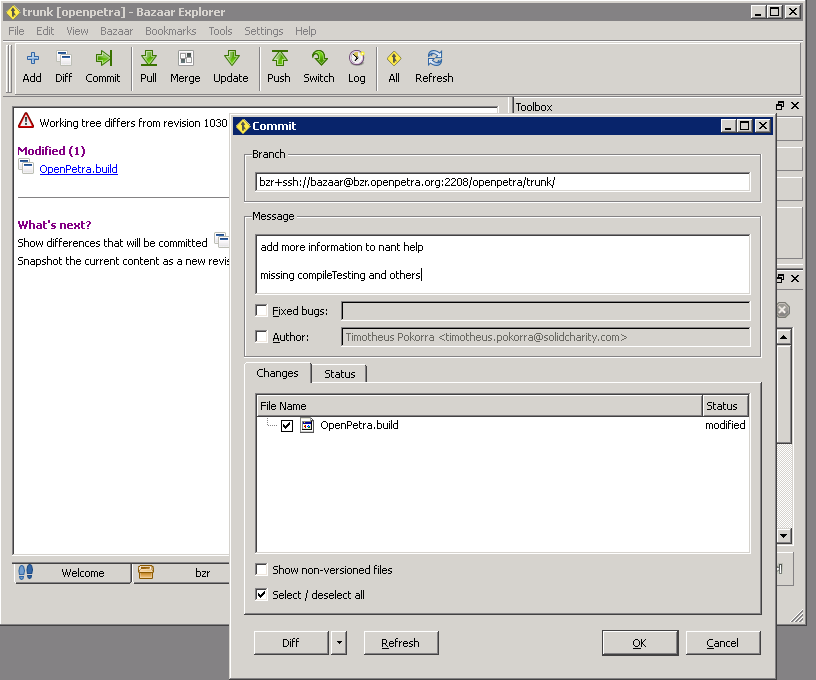
- Commit: commit local changes to the repository
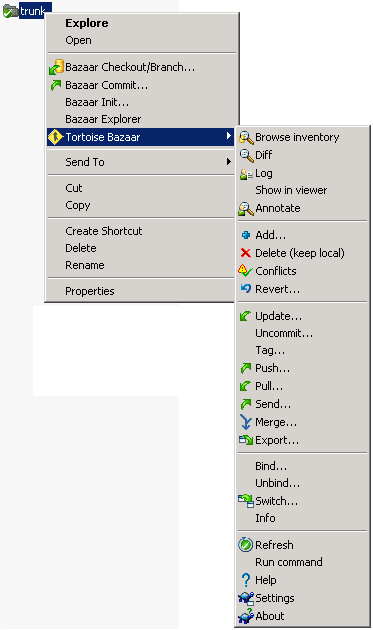
Alternatively, you can work with Tortoise Bazaar as well:
Create a working branch
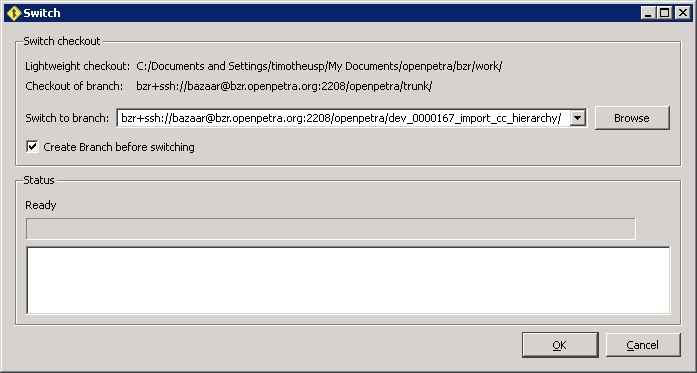
For a development/feature branch, you need to use the Switch command.
Make sure you tick the box "Create Branch before Switching".
You need to specify the name of the branch on the bazaar server.
In this example it is: bzr+ssh://bazaar@bzr.openpetra.org:2208/openpetra/dev_0000167_import_cc_hierarchy/
In the end, your code will still be in My Documents\openpetra\bzr\trunk, but if you commit, it will always be against bzr+ssh://bazaar@bzr.openpetra.org:2208/openpetra/dev_0000167_import_cc_hierarchy/, and the title of the Bazaar Explorer window also contains the name of the branch you are working with.
Rebase a branch
You should rebase your branch regularly, so that the changes happening in trunk are flowing back into your branch.
You need to click on Merge, and if there have been changes merged into your branch, you will need to Commit as well.
It is highly recommended to first commit all your own local changes, before doing a merge.
