Basic Tutorial
Introduction
The aim of this tutorial is to describe the functionality of OpenPetra at its current state. You will learn what you can do with OpenPetra, and how to do it.
There is a demo database available that will provide the examples for this tutorial.
Installation
Currently, only the Standalone version is available for quick installation on Windows. You just download it from Sourceforge via the link from the OpenPetra website.
You will need Administrator permissions to be able to install OpenPetra on your workstation.
The installer will tell you to install the .Net Framework if this is not installed on your windows system already.
The Standalone version of OpenPetra uses the light-weight database SQLite, which does not need to be installed separately. Please note that for bigger databases SQLite will become quite slow, and at that stage you might want to work with a proper database system. You can either install your own OpenPetra server running on Windows or Linux using a free database system, eg. MySQL or PostgreSQL. Alternatively, there will soon be a hosted service provided by some developers of OpenPetra, and for a small monthly fee you can benefit from a centrally hosted version of OpenPetra. More on this will follow soon...
Start your OpenPetra for the first time
You will find an OpenPetra icon in your start menu or even on the Desktop, if you did not disable that choice during the installation. When you double-click that icon, you will get to the Login screen:
Please login with the demo user, which means the username is demo and the password is demo as well.
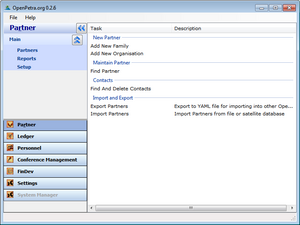
You will see the main screen of OpenPetra:
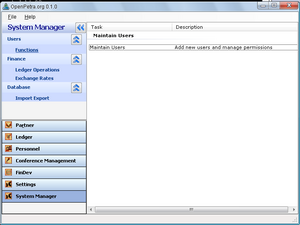
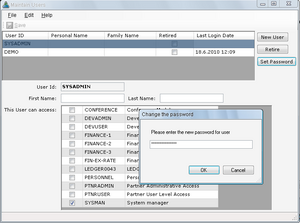
The first action you do, should be to change the password. To do this, you go into the System Manager module, and go in the menu to Users/Functions/Maintain Users.
Click on the button "Set Password" to change the password of the user DEMO, and do the same for user SYSADMIN too.
You can also retire the DEMO user, and create your own user. You should give permissions as you need for the user, by selecting the modules that the user should have access to.
Base Data
After you have installed the Standalone version of OpenPetra, you will have already a very limited set of data in the database.
If you want to start your very own database, please download the empty base Database, which contains just a demo user and some other necessary data to allow OpenPetra to start at all.
If you want to use a database with already quite a number of addresses, some months of financial data, etc, please download one of our other demo databases.
To install such a data file, please go to ...
Configuration
TODO
- create ledger
- site key
Managing 'Partners' and Addresses
Introduction and Definitions
In OpenPetra, the word 'Partner' is used to describe anyone who is helping the organisation in working towards its goals. Partners include individuals who support the Organisation through gifts, churches, organisations who supply goods and services, members of staff, and internal units (sub-divisions of the Organisation).
Partners and Partner Classes
Let’s look at an office. Nothing happens without relations with other people and groups, and in OpenPetra, everyone that the office deals with is called a Partner. Partners may be people or organisations. In fact OpenPetra uses several different classes of partner, since slightly different data needs to be stored for each. People are the most common, and we look at them below. Two of the classes, churches and organisations are fairly obvious (organisations include companies that we buy items from). Another common class of partner is a unit, a term used to refer to the internal sub-divisions or offices of the Organisation. Your office is a unit, and it will exchange information with other units.
Families and Persons
Finally we have people - the largest group of partners. The reason we left them until last is that people are more complicated than you might think! With many people, for example a married couple who support the Organisation, we only need basic information, like name, address and a record of donations. We treat the couple as one, and we call them a partner of class Family. OpenPetra uses this term, Family, even if the supporter is a single person.
However, in some situations, we need to record individual information, such as date of birth, gender, etc, which cannot apply to a couple. OpenPetra does this by using a fifth class of partner record, known as class Person. However, a Person record is only used for additional information; it is not the main record of the partner’s address etc.
Addresses
We must record a partner’s address, so that we know how to contact them. However, they may have more than one address - for example a private address and an office address. OpenPetra stores addresses separately from partners, and calls them locations. One partner can have several address locations. However, we need to know which address to send any mail to, and so we make one address the Mailing Address.
Where to find Partner and Address Functionalities
Partners and addresses are both maintained in the Partner Module of OpenPetra. You select the Partner Module by clicking "Partner" in the Navigation Pane of the Main Window of OpenPetra and then selecting "Partners" in the "Main" section.
Walk-through: Creating Partners
New FAMILY
To create a new Partner of Partner Class 'FAMILY', choose Add New Family in the New Partner Task Group in the Task Pane of the OpenPetra Main Window (found in the Partner Module).
The New Partner Dialog is brought up. It allows you to set several things before the Partner Edit Screen for a new Partner is shown.
- The 'Sites Available' list shows the available 'Sites'. An OpenPetra installation can use several Sites to split up the information that is entered. A sub-office will usually be a different Site and have a different 'Site Key' than the main office. Through that Partners with different Partner Keys will be created. In the demo data there is only one Site available, which is pre-selected for you.
- The Partner Key is set to a unique, non-used number. Although this can be changed, this is rarely necessary, so leave the value that is shown.
- The Partner Class can be changed to any other Partner Class, but this is already preset to FAMILY, so we can just accept that selection.
- The Acquisition Code can be set to reflect the way how we acquired this Partner's data. Have a look at the various values and select any one.
- Choose 'OK' once you are happy with your selection, or 'Cancel' to cancel the creation of a new Partner.
The Partner Edit Screen is shown.
- Fill in the Title, First Name(s), and Surname of the Partner you want to create.
- Check No Solicitations if the Family prefers not to be contacted by your organisation, except for important information (such as Gift Receipts).
- Select a value in the Addressee Type Field. This affects certain mailing operations in OpenPetra, eg. how to a Family is addressed in an email or letter.
- Select a value in the Partner Status Field. Usually Partners are ACTIVE when entered; not being ACTIVE means the Partner will automatically be excluded from many operations and Reports in OpenPetra.
- Save the information you have entered by pressing the Save Button in the ToolBar. Congratulations, you have created you first Partner! :-)
- Further details can be added by clicking on the Partner Details Tab. The data fields on this Tab allow recording of different information for each Partner Class - this is achieved by having different data fields for PERSONs, FAMILYs, ORGANISATIONS, etc. For instance, you could set the Marital Status to 'M' for married and record the wedding date in the Marital Status Since field. Notice that the date you enter is formatted in a specific way, which is used in OpenPetra in all of your offices all around the world to disambiguate dates (as the order of month, day, year can vary greatly).
- An address (or several) can be recorded on the Address Tab. You can also record telephone numbers, e-mail-Address, etc there. In case several Addresses are entered, one Address should be set as the Mailing Address so it is clear to which of the Addresses OpenPetra should send mail.
- Save the information you have entered by selecting Save in the File Menu.
Finding Partners
TODO
Partner reports
TODO
Manage donations
TODO
- import from bank transaction statement
- Post batches
- print gift receipts
- print other letters for treasurer or new donors
Pay your bills
TODO
GL Batches
TODO
- manual batches
- Reports


