Basic Tutorial: Difference between revisions
| Line 15: | Line 15: | ||
== Start your OpenPetra for the first time == | == Start your OpenPetra for the first time == | ||
You will find an OpenPetra icon in your start menu or even on the Desktop, if you did not disable that choice during the installation. When you double-click that icon, you will get to the Login screen: | You will find an OpenPetra icon in your start menu or even on the Desktop, if you did not disable that choice during the installation. When you double-click that icon, you will get to the Login screen: | ||
[[image:Login.png]] | |||
Please login with the demo user, which means the username is ''demo'' and the password is ''demo'' as well. | Please login with the demo user, which means the username is ''demo'' and the password is ''demo'' as well. | ||
You will see the main screen of OpenPetra: | |||
[[image:MainScreen1.png]] | |||
The first action you do, should be to change the password. To do this, you go into the System Manager module, and go in the menu to Users/Functions/Maintain Users. | The first action you do, should be to change the password. To do this, you go into the System Manager module, and go in the menu to Users/Functions/Maintain Users. | ||
[[image:MainScreenMaintainUsers.png]] | |||
Click on the button "Set Password" to change the password of the user demo, and do the same for user sysadm too. | |||
[[image:MaintainUsers.png]] | |||
== Base Data == | == Base Data == | ||
Revision as of 10:18, 18 June 2010
Introduction
The aim of this tutorial is to describe the functionality of OpenPetra at its current state. You will learn what you can do with OpenPetra, and how to do it.
There is a demo database available that will provide the examples for this tutorial.
Installation
Currently, only the Standalone version is available for quick installation on Windows. You just download it from Sourceforge via the link from the OpenPetra website.
You will need Administrator permissions to be able to install OpenPetra on your workstation.
The installer will tell you to install the .Net Framework if this is not installed on your windows system already.
The Standalone version of OpenPetra uses the light-weight database SQLite, which does not need to be installed separately. Please note that for bigger databases SQLite will become quite slow, and at that stage you might want to work with a proper database system. You can either install your own OpenPetra server running on Windows or Linux using a free database system, eg. MySQL or PostgreSQL. Alternatively, there will soon be a hosted service provided by some developers of OpenPetra, and for a small monthly fee you can benefit from a centrally hosted version of OpenPetra. More on this will follow soon...
Start your OpenPetra for the first time
You will find an OpenPetra icon in your start menu or even on the Desktop, if you did not disable that choice during the installation. When you double-click that icon, you will get to the Login screen:
Please login with the demo user, which means the username is demo and the password is demo as well.
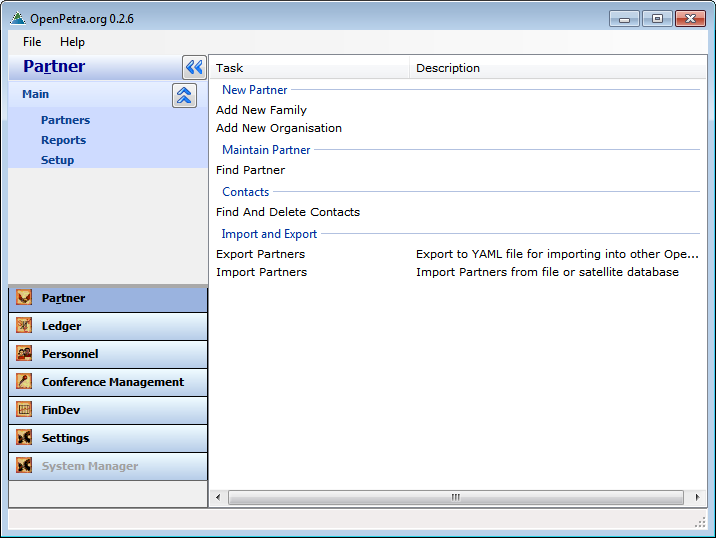
You will see the main screen of OpenPetra:
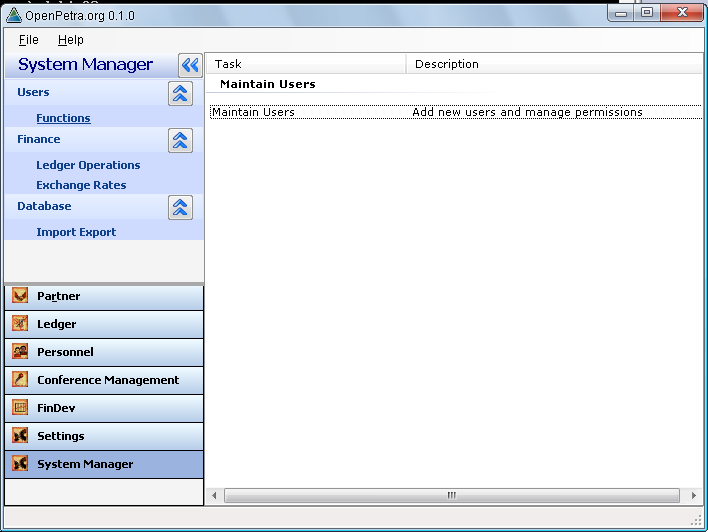
The first action you do, should be to change the password. To do this, you go into the System Manager module, and go in the menu to Users/Functions/Maintain Users.
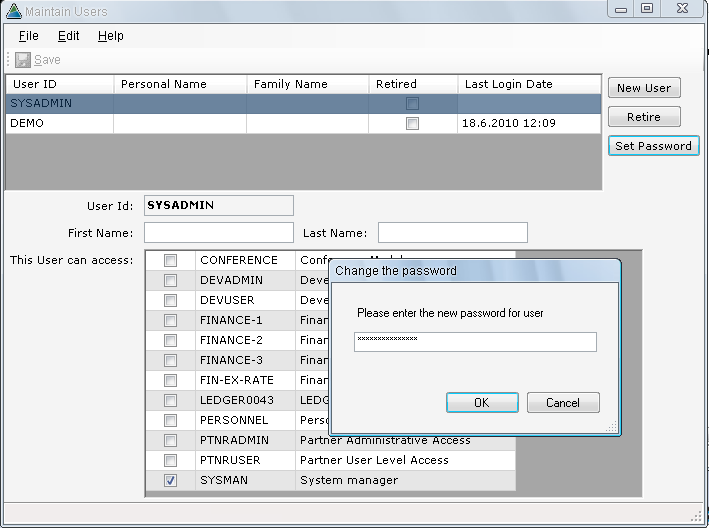
Click on the button "Set Password" to change the password of the user demo, and do the same for user sysadm too.
Base Data
After you have installed the Standalone version of OpenPetra, you will have already a very limited set of data in the database.
If you want to start your very own database, please download the empty base Database, which contains just a demo user and some other necessary data to allow OpenPetra to start at all.
If you want to use a database with already quite a number of addresses, some months of financial data, etc, please download one of our other demo databases.
To install such a data file, please go to ...
Configuration
TODO
- create ledger
- site key
Manage addresses and partners
TODO
- Create new partners
- Different types of partners: FAMILY, PERSON, ORGANISATION
- Find partners
- Partner reports
Manage donations
TODO
- import from bank transaction statement
- Post batches
- print gift receipts
- print other letters for treasurer or new donors
Pay your bills
TODO
GL Batches
TODO
- manual batches
- Reports


